By Bridie
Our latest project at Lotus Feast has been clay plaster painting our new yoga room walls, it’s 100% free of chemicals and uses natural mineral dies. This isn’t the first time we’ve used plaster paint as an alternative to traditional paint, but this time we went a little further – we’ve added flower petals from our garden to the wall!

A shot of the process: the natural sandy colour captures natural light while still creating a sense of warmth and depth to the room.
A beautiful textured and natural finish, the sandy colour gives our yoga room an earthy warm feeling and the petals make it our little piece of lasting summer no matter how long the Toronto winter lasts. Into the wet paint we blew, threw and pressed hand-cut nasturtium, lavender and yellow daisy petals from our garden.

 Why you should give it a go…
- It is a beautiful all natural alternative
- The textured sand finish adds an earthy feel to your home
- It does not require extra plastering to get a perfectly smooth wall, because the of the thickness and texture of clay paint covers it up, meaning less time spent sanding and plastering the walls
- No need to prime the entire wall, you just need to prime any dusty areas (e.g. plastered seams and plastered screws)

Colour sampling

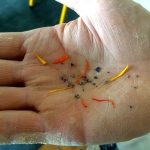
Petal cutting

Petals that look like goldfish chatting
A few tips and tricks we’ve learnt on the way…
How we did it – with this type of material, a lot of it is trial and error…for us…you learn while you’re on the go, so don’t be afraid, jump in and have fun with it.
- First paint skirting/base boards and trim and any walls that you’re not apply this method to. Painting tape sticks much better to smooth surfaces than to clay paint
- If the paint bubbles – don’t be alarmed, it is the moisture of the clay paint being absorbed by old layers of paint. Any bubbles bigger than your palm, cut out with a ‘exacto’ knife and re-apply the paint. Any smaller, let it dry out, often you’ll find they deflate
- As you apply, don’t go over the same spot too often because we found it created scraping marks
- We think it’s best to do on a warm dry day and good circulation so it doesn’t take too long to dry, a fan would be good to help to shorten the drying process
- If the paint loses it’s malleability when applying, mist the surface with water from a spray bottle
- Once you’ve mixed the paint use as soon as possible or store in the refrigerator, as it can take on a moldy smell
How to Make it
Adapted from: http://buildnaturally.blogspot.ca/2013/03/make-natural-non-toxic-paint-from-clay.html
Thick, opaque finish for absorbent wall surfaces; ideal over clay plasters or smooth cob
3 L water
4 L powdered clay
3 L fine sand
2 L wheat paste (see recipe below)
Optional enhancements: pigment, mica rock flakes, chopped straw or, of course flower petals!
Mix all ingredients together thoroughly, with a large whisk or a paint mixer attachment on a drill (or similar). Final consistency should be like a thin yogurt. Add extra water if needed. Apply thickly with high quality plastering scrapers or a course bristle brush. If using a brush, you may wish to apply two coats. Covers approx. 150 square feet.
[We didn’t try this but here is an optional final surface treatment: buff with a very flexible Japanese trowel or polished stone, or buff with a dry cloth or when paint is leather-hard (slightly firm), smooth the surface by buffing with a damp tile sponge. Rinse the sponge frequently.]
Note on color: you can choose a clay that is the color you want your paint to be…ie, a rusty orange clay will make rusty orange paint. Or you can use a white base clay and add any natural pigment to achieve any variety of colors, from earthy shades to vibrant colors. You can use pigments from a pottery supply store or from www.earthpigments.com or www.bioshieldpaint.com.
Wheat Paste – binder added to clay paint
Bring 6 cups water to boil in a non-aluminum pot. Meanwhile, mix 1 cup flour with 2 cup cold water until smooth and lump free. (If you can’t get it lump free, use an immersion/hand blender or you could run it through a blender). When water in pot is boiling, slowly add in flour/water mixture, stirring constantly. Bring back to almost a boil, stirring constantly, until mixture thickens. Remove from heat and allow to cool completely. The top may get a skin on it as it cools. You can prevent that by stirring as the mixture cools, or by putting a piece of plastic wrap against the surface as it cools. Or simply peel the skin off before using the wheat paste. Make wheat paste within a day or two of using it. It will go moldy after a few days (faster in warm weather), and then is not usable.
Makes approx. 8 cups of wheat paste
